Learning how to apply polyurethane to wood floors sounds straightforward, but here’s what many homeowners find: one rushed coat or skipped sanding step can leave your floor streaky, bubbled, or rough to the touch.
We’ve seen it happen many times. Homeowners invest hours sanding and prepping their hardwood, only to ruin the finish during application. The good news? Applying polyurethane to wood floors becomes manageable once you understand the specific techniques that separate amateur results from professional-grade finishes.
This piece walks you through the complete process of finishing hardwood floors with polyurethane, from proper surface prep to achieving that smooth, durable polyurethane wood finish. You’ll learn which tools to use, how many coats to apply, and the mistakes that derail most DIY projects.
Preparing Your Wood Floor for Polyurethane

Image Source: Ecohome
Preparing Your Wood Floor for Polyurethane
Floor preparation determines whether your finish bonds or fails within months before you open that polyurethane can. Homeowners who skip testing their floors often find adhesion problems only after the finish starts peeling.
Sanding the Floor
Sanding requires multiple passes with finer sandpaper grits each time. Start with 36-grit to remove old finish and level the surface, then move to 60-grit and finish with 80-grit for refinishing projects. Floors in better condition can begin at 120-grit and work up to 220-grit. Sand with the wood grain and never across it. Cross-grain scratches show through polyurethane no matter how many coats you apply.
The sanding process creates a roughened surface that helps polyurethane adhere and opens the wood’s pores for better penetration. Vacuum after each grit pass before moving to the finer grit. Dust particles left between passes get embedded in the wood and show through your finish.
Cleaning and Removing Dust
Vacuum the floor at least twice after final sanding. Pay attention to cracks between boards and edges near baseboards. A single vacuum pass doesn’t capture everything. Wipe the entire surface with a tack cloth to pick up fine dust particles that vacuuming misses. The final cleaning step uses a damp cloth moistened with mineral spirits for oil-based polyurethane or water for water-based products. The cloth should be barely damp, not wet.
Checking Floor Condition
Test your floor before applying polyurethane. Polyurethane will not bond to the surface if previous owners used Murphy’s Oil Soap, Orange Glo or acrylic waxes like Mop & Glo. These residues cause fish-eye defects and widespread peeling even after aggressive sanding. You cannot see or feel these residues, but they will ruin your finish. Neutralize old pet stains with specialized treatments before refinishing, as ammonia salts prevent adhesion.
Protecting Baseboards and Trim
Remove shoe molding if present and label each piece. Mark corresponding walls for reinstallation. Floors without shoe molding need tape at the floor edge where it meets the baseboard. Clean the floor before applying tape to ensure adhesion.
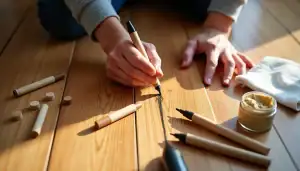
Choosing the Right Polyurethane and Tools

Image Source: Bob Vila
Choosing the Right Polyurethane and Tools
Polyurethane selection affects not just your floor’s appearance but how long the project takes and how durable the finish becomes. Homeowners who choose based on price alone often regret it once they deal with application difficulties or premature wear.
Oil-Based vs Water-Based Polyurethane
The choice between oil-based and water-based polyurethane involves trade-offs. Oil-based forms a tougher protective layer and resists scratches better than water-based finishes. It develops a warm amber hue that deepens over time and enhances wood character, but it may clash with certain design styles. Cleanup requires mineral spirits or paint thinner, and the strong odor lingers for several days. Each coat takes about four hours to dry with 24 hours required before recoating.
Water-based polyurethane dries in two hours and can be recoated in four hours. It maintains a clear finish that won’t yellow, which makes it ideal for light woods like maple or birch. Cleanup happens with soap and water. But it scratches more easily and requires additional coats to match oil-based durability.
Essential Tools and Materials You’ll Need
Oil-based polyurethane works best with lambswool applicators for smooth application and natural bristle brushes on edges. Water-based products require synthetic brushes or foam rollers. You’ll also need 220-grit sandpaper to sand between coats, dust masks and gloves to protect yourself, and a stir stick (never shake polyurethane).
How Many Coats You’ll Need
Industry standards call for two to three coats of oil-based polyurethane or three to four coats of water-based polyurethane. Water-based finishes contain only 30 to 35 percent solids compared with 45 to 50 percent in oil-based products, which explains why more coats are needed. High-traffic areas benefit from an additional coat whatever the type.
Step-by-Step Guide to Applying Polyurethane

Image Source: The Spruce Crafts
The application process requires precision at every step. Homeowners who rush through these stages often end up with bubbled, uneven finishes that require complete removal and reapplication.
Step 1: Stir the Polyurethane
Stir the polyurethane with a stir stick gently. Never shake the can. Shaking introduces air bubbles that appear on the finished surface. Stir slowly to avoid creating bubbles in the mixture.
Step 2: Apply the First Coat
Apply thin, even coats using a lambswool applicator for oil-based or synthetic applicator for water-based polyurethane. Start at a corner and work toward an exit to avoid stepping on wet areas. Apply in the direction of the wood grain. Multiple thin coats produce better results than one thick coat.
Step 3: Let It Dry
Water-based polyurethane dries in 2-4 hours. Oil-based requires 24 hours between coats. The surface feels dry to the touch but remains soft underneath. Never apply the next coat before the recommended drying time passes.
Step 4: Sand Between Coats
Sand with 220-grit sandpaper lightly once the previous coat has dried[261]. Sand to roughen the surface without cutting through the finish. Vacuum and wipe with a tack cloth to remove all dust.
Step 5: Apply Additional Coats
Repeat the application process for subsequent coats. Apply the same thin, even layers following the wood grain. Each thin coat dries faster than thick application.
Step 6: Allow Final Cure Time
Oil-based polyurethane requires 7-30 days to fully cure. Water-based needs 7-14 days for complete hardness[201]. Avoid placing rugs or heavy furniture until the finish cures.
Common Mistakes and How to Avoid Them

Image Source: Facebook
Most finishing failures happen during application, not preparation. Homeowners often find these mistakes only after the polyurethane has dried. Repairing them means stripping everything back to bare wood.
Applying Too Thick
Thick coats cause tacky finishes, slow curing, cracking, and delamination. Apply polyurethane at maximum 4 mils wet, which dries to roughly 2 mils. Homeowners rushing to finish often pour heavy coats and think it saves time. The finish stays soft for weeks and attracts dust. Apply multiple thin layers instead of two thick ones.
Not Sanding Between Coats
Skip sanding and your finish will flake over time, especially when you have high-wear surfaces. Polyurethane needs sanding for proper adhesion between coats applied more than 4 hours apart. The varnish cannot bond at a molecular level once curing completes.
Poor Ventilation Issues
EPA research found common organic pollutants measure 2 to 5 times higher indoors than outdoors. Concentrated fumes cause eye and throat irritation. Work in well-ventilated spaces and apply thin, even coats to reduce exposure.
When to Call a Professional
First-time refinishers sand floors too deep and shorten the floor’s lifespan. Uneven sanding creates permanent divots that even professionals cannot fix later.
Conclusion
You now have everything needed to apply polyurethane to your wood floors. The key elements we’ve covered are proper sanding and cleaning, choosing the right polyurethane type, and applying multiple thin coats with adequate drying time between each.
Patience matters most here. Rushing through preparation or applying thick coats creates problems that take weeks to fix. Follow these techniques and your floors will develop that durable, smooth finish that lasts for years. Keep in mind the common mistakes we discussed. You’ll avoid the frustrations most first-timers face.
FAQs
Q1. What’s the most effective method for applying polyurethane to hardwood floors? Use a lambswool applicator for oil-based polyurethane or a synthetic applicator for water-based products. Apply thin, even coats in the direction of the wood grain, starting from a corner and working toward an exit. Multiple thin layers produce better results than one thick coat, and always allow proper drying time between applications.
Q2. What are the most frequent mistakes people make when applying polyurethane? The most common errors include applying coats too thick, which causes slow curing and cracking; skipping sanding between coats, leading to poor adhesion and flaking; working in poorly ventilated areas; and rushing through the drying process. Applying polyurethane at maximum 4 mils wet and sanding lightly with 220-grit sandpaper between coats helps avoid these issues.
Q3. Should I use a brush or applicator pad for polyurethane application? For large floor surfaces, use a lambswool applicator for oil-based polyurethane or a synthetic applicator for water-based products. Reserve brushes for edges and corners—natural bristle brushes work best with oil-based finishes, while synthetic brushes suit water-based products. Applicator pads provide more even coverage on open floor areas.
Q4. Is applying three coats of polyurethane really necessary? Yes, multiple coats are essential for durability. Oil-based polyurethane typically requires two to three coats, while water-based needs three to four coats because it contains fewer solids (30-35% compared to 45-50% in oil-based). High-traffic areas benefit from an additional coat regardless of the type used.
Q5. How long should I wait before walking on newly finished polyurethane floors? While water-based polyurethane dries in 2-4 hours and oil-based in 24 hours, complete curing takes much longer. Oil-based polyurethane requires 7-30 days to fully cure, while water-based needs 7-14 days. Avoid placing rugs or heavy furniture until the finish has completely cured to prevent damage.