A pipe bursts at midnight, water floods your bathroom, and you have no idea where the shut-off valve is. Sound familiar?
This plumbing 101 guide changes that. Understanding your home’s plumbing system isn’t just for professionals; it’s essential knowledge that can save you thousands in emergency repairs and water damage.
Your home’s plumbing actually consists of two separate systems working together: one brings fresh water in, while the other removes wastewater. Once you understand how these systems function, you’ll handle minor issues confidently and know exactly when to call a pro.
The Two Main Systems That Make Up Your Home Plumbing
Water Supply System: How Fresh Water Enters Your Home
Your home receives fresh water through a pressurized system that starts at either a municipal main line or a private well. This pressure allows water to travel upward to second floors, reach distant fixtures, and respond immediately when you open a faucet.
The main water line enters your home through the foundation and connects to a water meter that measures usage. From there, water splits into two paths. Cold water routes directly to fixtures like sinks, toilets, and outdoor spigots. Hot water takes a detour through your water heater before traveling through separate pipes to fixtures that need temperature control.
Water remains under constant pressure throughout these supply pipes. This pressure is what pushes water through the system, allowing multiple fixtures to operate simultaneously. Without adequate pressure, upper floors and distant fixtures suffer first, often showing weak flow at showers and faucets.
Drain-Waste-Vent (DWV) System: How Wastewater Leaves
The DWV system operates on an entirely different principle. Instead of pressure, it relies on gravity and air displacement to remove wastewater from your home.
Drain pipes angle downward, carrying used water and waste from fixtures toward the main sewer line or septic tank. These pipes connect to increasingly larger pipes as they progress, similar to how small streams feed into larger rivers.
Vent pipes play a role that’s often misunderstood. Think of a to-go coffee cup lid with an air hole. That small opening allows liquid to flow smoothly. Vent pipes work the same way in your plumbing. They extend through your roof, allowing air to enter the drainage system as water flows down. Without this airflow, drainage would slow considerably.
The venting system prevents vacuum pressure that can disrupt drainage. When water moves through drain pipes, it displaces air. Vents allow that air to escape and be replaced, maintaining neutral pressure throughout the system.
P-traps are U-shaped pipe sections beneath sinks, showers, and other fixtures. These curves hold a small amount of water that acts as a seal against sewer gasses. Without proper venting, vacuum pressure can siphon water out of these traps, breaking the seal and allowing foul odors to enter your home. The venting system prevents this by equalizing air pressure and maintaining trap seals.
Why These Systems Don’t Overlap
Water supply and drainage must remain completely separate subsystems. This separation is non-negotiable for health and safety reasons. Supply pipes carry clean, pressurized water. Drain pipes carry contaminated wastewater that flows by gravity.
The only connection points between these systems are fixtures: sinks, toilets, showers, washing machines, and dishwashers. In essence, fixtures are bridges where clean water enters and wastewater exits. A faucet draws from the supply system. The drain below it connects to the waste system. These two networks never directly touch.
This separation also explains why supply pipes are pressure-bearing and require different materials and installation standards than drainage pipes, which are non-pressure systems. Each system has distinct engineering requirements based on its function.
Understanding Your Water Supply System Components
Main Water Line and Water Meter
The main water line serves as the primary connection point between your property and the municipal water supply or well system. This pipe typically ranges from 3/4 inch to 4 inches in diameter and runs underground from the street to your home. The line travels deep enough beneath your property to avoid freezing, usually 18 inches or more depending on local frost depth requirements.
Your water meter sits along this main line and measures every gallon of water entering your home. Meter location varies by property age and design. Older homes typically have meters inside, often in the basement near the wall closest to the street. Newer installations may place the meter outside in an underground pit at the property line.
The main shutoff valve sits before or after your meter. This valve cuts off water flow to your entire home, making it necessary during repairs or emergencies. Knowing its exact location saves critical time when a pipe ruptures. Valves come with either round wheel handles or lever handles.
Hot and Cold Water Distribution
Once past the meter, the main line continues into your home and reaches a split point just before the water heater. At this junction, the supply divides into two distinct service lines.
The cold water service line branches away from the heater and runs directly to every fixture requiring cold water. Plumbers install these pipes in straight lines or 90-degree angles to facilitate flow. Each fixture connects through its own intake pipe that branches from the cold water trunk line.
The hot water path follows a different route. Water continues to the heater tank, where heating elements warm the contents. The heater then pushes heated water into separate hot water service lines that run parallel to the cold lines throughout your home. These two pipe systems never intersect, traveling side by side to supply fixtures with both temperature options.
Water Pressure: What It Is and Why It Matters
Water pressure measures the force pushing water through your pipes, quantified in pounds per square inch (PSI). The ideal residential range sits between 40 and 60 PSI. This range ensures adequate flow without stressing pipes and appliances.
Municipal supply lines carry water at pressures reaching 200 PSI. Such high pressure would damage home plumbing systems. A pressure-reducing valve (PRV) installed near the main shutoff valve steps this down to safe levels.
Pressure outside the optimal range causes problems. Below 40 PSI, showers produce weak streams and toilets fill slowly. Above 60 PSI, pipes develop leaks, fixtures make loud banging noises called water hammer, and appliances fail prematurely. Testing pressure requires only an inexpensive gage available at hardware stores.
Common Pipe Materials Used in Water Supply
Modern homes use various pipe materials, each with distinct characteristics:
- Copper: Lasts up to 50 years and handles both hot and cold water. Available in different thicknesses (M, L, and K grades), with K-grade used for high-pressure and underground applications. Price and installation labor have reduced its popularity.
- PEX (cross-linked polyethylene): Flexible tubing that lasts more than 50 years. Comes in long rolls, bends around corners easily, and requires fewer fittings. Most plumbers now prefer PEX over copper for water supply installations.
- Copper with protective coating: Required in certain soil conditions for underground applications.
- Galvanized steel: Common before the 1960s with a functional life of about 40 years. No longer used for new installations due to labor-intensive installation and corrosion over time.
Supply lines commonly use copper, brass, or ductile iron, depending on local code requirements and specific applications.
How the Drain-Waste-Vent System Works
Drain Pipes and the Role of Gravity
Drain pipes collect used water from sinks, showers, and tubs, while waste pipes carry solid waste from toilets. These pipes angle downward throughout your home, relying entirely on gravity to move contents toward the main sewer line or septic tank. Plumbers install drain lines with a deliberate slope that allows water to flow freely without settling.
The system connects to increasingly larger pipes as it progresses, similar to tributaries feeding a river. Small drain lines from individual fixtures merge into larger branch lines, which then connect to the main stack. This vertical pipe, often 3 to 4 inches in diameter, runs from above your roof down to the main sewer connection.
P-Traps: Your First Defense Against Sewer Gas
Every drain in your home has a U-shaped pipe section called a P-trap beneath it. Named after its distinctive shape, this fitting contains a J-bend on one end that connects to your fixture and exits into your drainage system on the other.
The bend collects water in its curve, creating a water seal measuring 1.5 to 2 inches at the weir. The weir marks the upper bend of the P-trap where water would start spilling into the wall tube. This standing water acts as a physical barrier, preventing sewer gasses from entering your home. These gasses include methane, hydrogen sulfide, nitrogen oxides, sulfur dioxide, and ammonia.
With every use of the fixture, fresh wastewater flushes through the P-trap, replacing old water with new. The U-shape also captures sediment and debris, preventing it from passing into the sewer. Consequently, dropped jewelry often stops at the P-trap rather than traveling deep into your drainage system.
P-traps come in two materials. Brass versions feature chrome plating for visual appeal but corrode over time with repeated use. Polypropylene traps resist corrosion and reactions with acids, plus their lightweight properties simplify assembly and disassembly.
Vent Pipes: Keeping Air Flowing Through Your Drains
Vent pipes extend vertically from drain lines through your roof, allowing air to enter the plumbing system. As water travels down drainpipes, it creates negative pressure behind it. Without proper ventilation, this suction pulls water from nearby traps, causes slow drainage, creates gurgling noises, and allows sewer odors inside.
The vent system balances pressure by supplying air behind flowing water. This air supply helps drains flow freely and quietly while maintaining trap seals. Additionally, vents channel sewer gasses produced by decomposing waste safely outside your home.
Most homes have a main vent stack connected to the main drain line, with smaller branch vents serving individual bathrooms and kitchens. Signs of blocked or missing vents include gurgling sounds, unusual sewer smells, fixtures draining slowly after other fixtures are used, and toilets not flushing completely.
Critical Components Every Homeowner Should Know
Knowing which components to access during routine maintenance or emergencies separates prepared homeowners from those calling plumbers at 2 AM. These three categories form the foundation of plumbing literacy.
Shut-Off Valves: Where They Are and How to Use Them
Your plumbing system contains multiple shut-off valves that control water flow to your entire home or individual fixtures. Finding these valves before an emergency prevents extensive damage.
The main shut-off valve appears most commonly in basements, utility rooms, or outdoors in warm climates. This valve stops all water entering your house. Fixture-level shut-off valves sit near toilets, sinks, and appliances, allowing localized shutoff without affecting other areas.
Ball valves feature a lever handle requiring a 90-degree turn clockwise to shut off water. When the handle runs parallel to the pipe, water flows normally. Perpendicular positioning stops flow completely. Gate valves use a wheel-shaped handle that turns clockwise multiple times until it stops turning.
Exercise all shut-off valves once or twice yearly by turning them on and off. This practice prevents mineral buildup from seizing the valve. A stuck valve transforms a small leak into a costly disaster.
Fixtures: Your Access Points to Water
Fixtures are the sinks, toilets, showers, tubs, and faucets that provide access to water. These visible components rely on the hidden network of pipes, drains, and vents to function. Faucets regulate flow and temperature, ranging from basic two-handle models to pull-down sprayers. Toilets vary from basic tanks to dual-flush and pressure-assisted models. Addressing leaks, drips, or clogs early maintains the entire system.
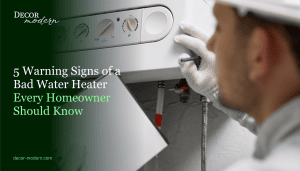
Water Heater Basics
Water heaters heat cold water and send it through separate lines to fixtures requiring hot water. Tank-style models store and heat water continuously, with capacity ranging from 30 to 40 gallons for one or two people, up to 60 to 80 gallons for five or more people. Tankless units heat water on demand without storage, offering 24 to 34 percent greater efficiency for households using about 40 gallons daily. Hybrid heat pump models use refrigeration systems to extract heat from surrounding air, consuming electricity comparable to a refrigerator.
Simple Maintenance Steps to Keep Your Plumbing Running Smoothly
Routine maintenance prevents most plumbing disasters and extends system lifespan significantly.
What to Inspect and How Often
Schedule a comprehensive plumbing inspection at least once every two years. Homes with older plumbing or previous issues benefit from annual professional assessments. Between professional visits, perform monthly visual checks of exposed pipes and under-sink areas. Look for moisture, corrosion, rust, or unusual sounds. Check your water meter with all fixtures off; movement indicates a hidden leak. Test water pressure every few years to confirm it remains between 40 and 60 PSI. Inspect water heaters annually for rust, leaks, and sediment buildup, flushing the tank to remove accumulated deposits.
Preventing Clogs in Drains
Install screens over all drains to catch hair, food particles, and debris before they enter pipes. Only organic liquids and small amounts of non-fibrous foods belong in kitchen drains. Never pour grease or fats down drains; collect them in disposable containers and discard with trash. Rice, pasta, and eggshells damage garbage disposals despite common misconceptions. Flush only toilet paper and human waste down toilets. Products labeled “flushable” sit in moist packaging without breaking down and cause frequent clogs. Pour hot water down drains regularly to dissolve grease and soap residue. For slow drains, use baking soda and vinegar rather than chemical cleaners.
Protecting Pipes During Winter
Frozen pipes generally occur below 20°F but can freeze at higher temperatures when pipes lack insulation. Insulate pipes in attics, crawl spaces, and along exterior walls using pipe insulation or heat tape. Disconnect garden hoses and drain outdoor faucets before freezing weather. When temperatures drop, open cabinet doors under sinks to allow warm air circulation. Run faucets at a trickle to keep water moving through pipes. Focus dripping on faucets along exterior walls.
When to Call a Professional Plumber
Burst pipes require immediate professional attention after shutting off the main valve. Sewer backups create health hazards demanding professional intervention. Persistent clogs after DIY attempts signal deeper blockages in main drain lines. Standing water, discolored water, or unexplained spikes in water bills warrant professional inspection. Gas leaks require immediate evacuation and professional service.
Conclusion
You now understand the two systems that keep water flowing through your home and how they work independently. Above all, knowing where your shut-off valves are located and how to use them can prevent thousands in water damage during emergencies.
Regular maintenance keeps your plumbing running smoothly for years. Check for leaks monthly, protect your pipes during winter, and address small issues before they become expensive repairs.
Most importantly, you can now handle basic plumbing tasks confidently and know exactly when professional help is necessary. Your home’s plumbing system no longer needs to be a mystery.