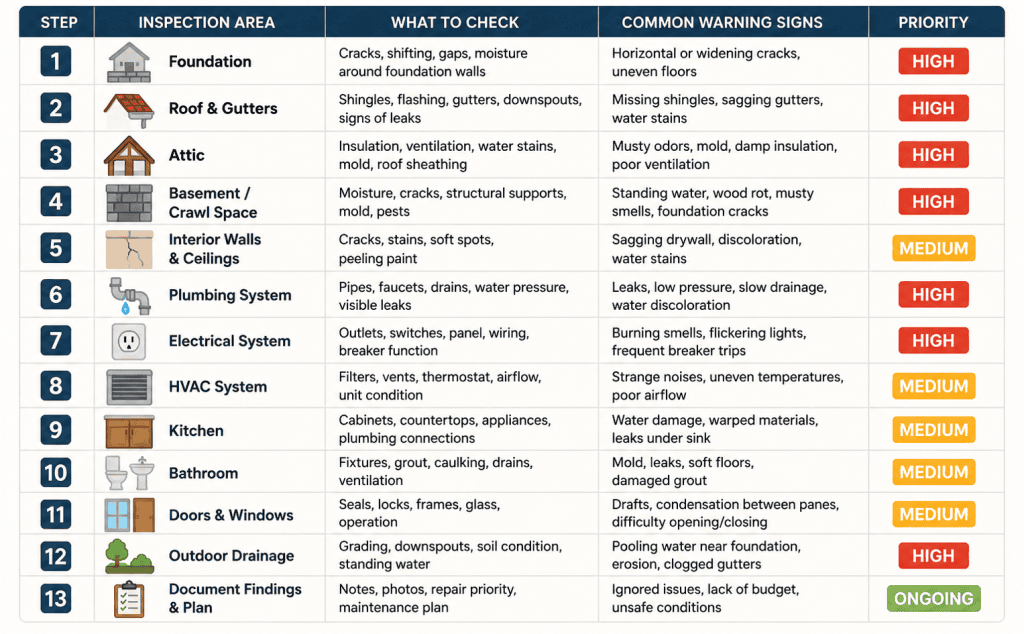
Professional home inspections average around $424 these days. That’s not pocket change. The good news is you can do the same kind of walkthrough yourself. This article illustrates a checklist that covers every significant area.
Foundation
Walk the perimeter of your house. You’re looking at the foundation wall. Cracks happen and little ones aren’t that scary. But if you spot wide cracks or horizontal ones, pay attention—those can mean the ground is shifting. Check especially where the foundation meets the walls of the house.
Roof and Gutters
Look for shingles that are missing, bent or rusted flashing, growing moss, and any sections that seem to dip. Gutters matter too, since they move water away from everything below, so you have to clean them regularly.
Attic
Pop your head up there and look for water stains on the wood or insulation. If the insulation feels damp, you might have a venting problem. Mold and a musty smell are dead giveaways that moisture is hanging around longer than it should.
Basement and Crawl Space
This is where problems hide. Check for standing water, mold, soft wood and cracks you haven’t seen from outside. Seeing daylight through a crack? That’s something you want to address sooner rather than later.
Walls and Ceilings
Walk through every room. Discolored patches, peeling paint, drywall that’s starting to sag, or cracks that don’t look like normal settling—all of it can point to leaks above. Bathroom and kitchen ceilings, along with anything directly under a roof, are the first places to inspect.
Plumbing
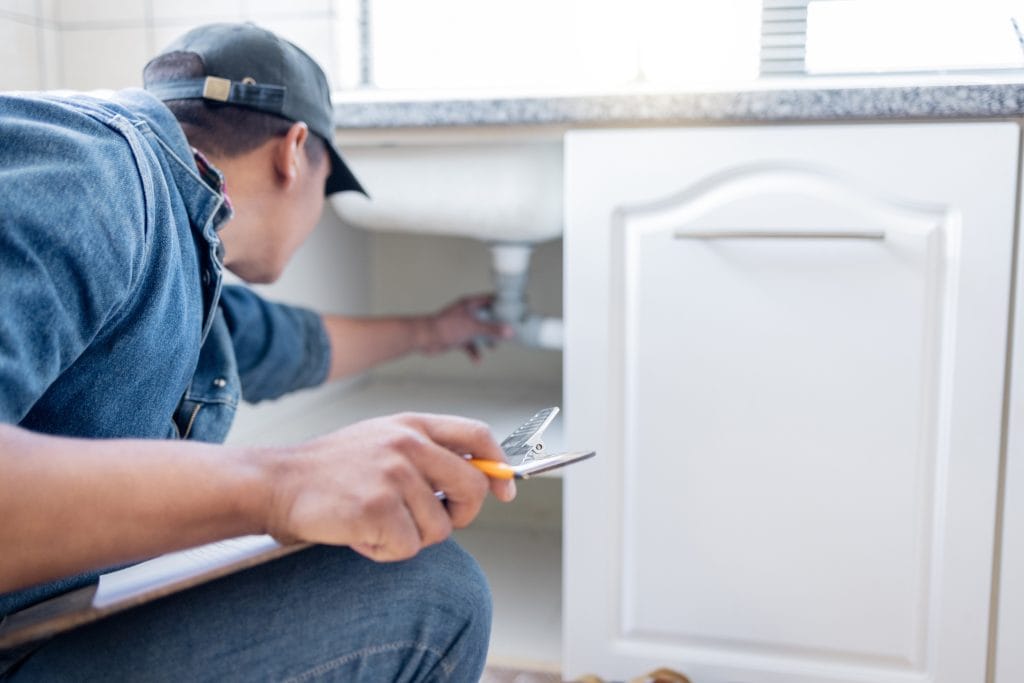
Check wherever pipes are visible—especially under sinks and around toilets. Drips, rust-colored stains, or white mineral buildup should be addressed. If the water pressure feels weak or a drain is slow, that’s your cue that something’s off, too. Don’t underestimate a tiny leak—it can waste gallons of water over the course of a month.
Electrical
Test outlets and switches for any that feel warm or make crackling sounds. Open your electrical panel—labels should be legible and nothing should look scorched. If breakers trip often or you ever smell a burning odor, that’s not a “later” problem, that’s a right-now problem.
Heating and Cooling
Change those filters if they’re dirty. Try to feel the airflow from vents. Any rattling or grinding that doesn’t sound normal coming from the furnace or AC unit is worth investigating. A clean system runs cheaper.
Kitchen
Open cabinets beneath the sink and feel for dampness. Water leaks there love to go unnoticed until the bottom of the cabinet starts to crumble. Check appliance connections, countertops for loose sections, and any sign of swelling in the wood.
Bathrooms
Bathrooms never dry out completely—they always stay a little humid. Look for faucet drips, rocking toilets, peeling caulk. Mold around the tub or shower is a clear sign moisture is getting where it shouldn’t.
Doors and Windows
On a breezy day, run your hand around the edges—feel air coming through? Weatherstripping wears out. Condensation trapped between double-pane glass means the seal failed. And if a window or door is a struggle to open, it’s telling you something’s shifted.
Drainage
Next time it rains, walk outside to watch where the water goes. It should always be moving away from the house. If you’ve got puddles sitting right next to the foundation or downspouts just dumping water along the wall, that’s asking for trouble—cracks, basement leaks, you name it. Sometimes all it takes is extending the downspouts a few feet or building up the soil so it slopes the right way.
Home Inspection Checklist
Bottom Line
Every time you do a walkthrough, take pictures and jot notes. Give yourself deadlines. Fix anything that’s an active safety hazard or actively leaking first. Then schedule the preventive fixes so small things don’t balloon into huge bills.
Make this a habit. Run through these 13 spots at least once a year. Finding trouble early is what saves you money and keeps your place from falling apart piece by piece. It takes a little time, sure, but it adds years to every system in your home and puts extra cash in your pocket when you eventually sell.