Most pet owners know this reality well: your furry friend brings joy, but those excited paws leave their mark. You need to learn how to fix scratches on hardwood floors from a dog. Dog scratches on hardwood floors range from light surface scuffs to deep gouges. Urine stains create damage that can penetrate deep into the wood. Most scratches can be fixed with simple tools and techniques you have around the house. This piece walks you through identifying scratch severity and gathering the right materials. You’ll learn repairing dog scratches on wood floors in clear steps. We also cover proven prevention strategies to protect your floors from future damage.
Quick Answer: How to Fix Dog Scratches on Hardwood Floors

Image Source: This Old House
Understanding Sketch Severity
Run your fingernail across the damaged area. If your nail glides smoothly without catching, you’re dealing with a surface scratch confined to the finish layer. These scratches appear as thin, light-colored lines and respond well to DIY repairs since the wood beneath remains untouched.
If your fingernail catches in the groove, the damage penetrates deeper and requires more involved techniques. The water test provides additional confirmation. Place a single drop of water on the scratch. If the mark disappears or becomes way less noticeable while wet, the damage stays within the polyurethane finish layer. Water fills the scratch temporarily and shows how a proper repair might look.
If water produces no effect on the scratch’s appearance, the damage has reached the wood fibers beneath the protective coating. White or gray scratches reveal raw, unprotected wood underneath and exceed simple DIY fixes. These deeper scratches feel rough to the touch and appear darker than surrounding areas.
Many deep scratches clustered in high-traffic zones signal that your floor’s protective finish is wearing thin across the entire surface. Look for signs of additional problems like discoloration, soft spots, or warping around scratches, especially in areas exposed to moisture. If damaged areas exceed a few square inches or repairs seem too complex, getting a professional opinion is wise.
Why Dog Scratches Happen on Wood Floors
Dog nails create scratches even with consistent trimming attention. The bigger the dog, the greater your chances of those scratches occurring. Hard toenails leave their mark during normal daily movement, but high-traffic areas like entryways face heavy exposure when excited dogs storm through the door.
The hair and dirt that falls off dogs acts like sandpaper against wood floors and gives every step a chance to scratch the surface. This debris tracked indoors creates tiny scratches that become difficult to remove after you or your pet step on them. Dogs bring in dirt from outside during regular activity, and this accumulation compounds the damage from their nails alone.
Moving furniture, toys, and rambunctious play add to the physical damage beyond just walking patterns. Dogs may dig their claws into flooring or scratch while playing and create varied damage depths depending on the activity level and floor hardness.
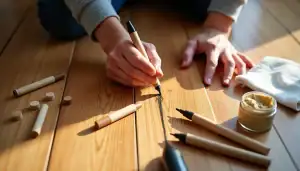
Tools and Materials You’ll Need

Image Source: Romero Hardwood Floors
Gathering the right materials before you start repairs saves trips to the hardware store and matches your fix to how severe the damage is. Most repairs need simple cleaning supplies whatever the scratch depth, so stock up on lint-free cloths and a gentle wood floor cleaner first.
Supplies for Light Surface Scratches
Wood repair markers handle surface-level damage confined to the finish layer. Minwax Wood Finish Stain Markers and Rejuvenate Wood Furniture and Floor Repair Markers work like pens to cover minor imperfections. These markers coordinate with common wood finishes including oak, cherry, and walnut. Blend pencils provide another no-mess option, and you can mix different shades to create custom colors that match your specific floor.
Natural solutions are alternatives before you purchase commercial products. Olive oil or mineral oil applied with a soft cloth can camouflage surface scratches by feeding the wood. Raw walnut rubbed into scratches works on lighter colored floors, while equal parts lemon juice and vegetable oil create another masking option.
Materials for Medium-Depth Scratches
Wax filler sticks address scratches you can feel with your fingernail. DAP Wood Blend Sticks come in packs for dark wood and light wood varieties. Hard wax provides better durability for high-traffic areas. Soft wax works well for minor filling. A hair dryer helps warm the wax stick for smoother, more controlled application.
Wood putty handles damage that’s a bit deeper. Minwax Color-Matched Wood Filler is a no-sand solution ready to use straight from the container. Plastic putty knives prevent additional damage during application, unlike metal alternatives that can scratch surrounding areas. Fine-grit sandpaper smooths the repair after it dries.
Equipment for Deep Gouges and Scratches
Professional-grade epoxy solutions like the Maven Hardwood Repair Kit tackle severe damage. These kits include mixing nozzles and applicators with multiple set times ranging from 5 to 60 minutes. Wood fillers such as Bona Pacific Filler and Woodwise Full Trowel work for major imperfections before refinishing.
Step-by-Step Repair Process
Step 1: Clean the Damaged Area
Use a microfiber cloth or dust mop to remove dirt and debris. Anything left behind makes the problem worse as you work. A hardwood-specific cleaner that’s pH-neutral and safe for your finish works best. A clean surface allows repair methods to work better and prevents dirt from settling into scratches.
Step 2: Identify Your Scratch Type
Run your fingernail across the scratch. Your nail won’t catch if you have a surface scratch. Apply a drop of water on the mark. The damage stays within the finish layer if it disappears while wet. The scratch has reached the wood fibers beneath when water produces no effect.
Step 3: Fix Light Surface Scratches
Crack open a walnut and rub the fleshy part along the scratch, moving with the wood grain. Let the natural oils sit for ten minutes, then buff with a clean cloth. Wood stain markers work well for visible color damage using light, feathery strokes that follow the grain. Test markers in hidden areas first and choose shades lighter than your floor since scratches absorb more stain.
Step 4: Repair Medium-Depth Scratches
Warm wax sticks with a hair dryer for better application. Press wax into the scratch and fill it. Use a plastic putty knife to scrape away excess and make the repair flush with the floor. Wood putty repairs need application with a putty knife and time to dry. Sand with 180-220 grit sandpaper and follow the grain.
Step 5: Fill and Finish Deep Gouges
Apply wood filler in shallow applications for deep holes to prevent cracking and shrinking. Press with a putty knife and let each layer dry before adding more. The area needs more drying time if filler clogs your sandpaper during sanding. Sand the dried filler until smooth and flush with the surface.
Step 6: Apply Protective Finish and Allow Curing Time
Use a foam brush to apply thin polyurethane coats and brush inward from the edges. Let each coat dry, then sand before adding more. Match the finish type—gloss or satin—to your existing floor. Apply finish to blend the repaired area with surrounding wood and feather edges for seamless transitions.
Preventing Future Dog Scratches on Hardwood Floors

Image Source: Flawless Floors
Keep Your Dog’s Nails Trimmed
Trim your dog’s nails every two to four weeks for indoor dogs. Outdoor dogs on concrete may need trims every four to six weeks. Listen for clicking sounds on your floor. If you hear them, trim them. Overgrown nails alter your dog’s gait and increase floor damage. Rubber claw sheaths slide onto individual nails as an alternative if trimming proves difficult.
Use Protective Rugs and Mats
Rugs work well in high-traffic areas like hallways, foyers and entryways. Indoor/outdoor rugs handle heavy use and clean with simple wiping. Flatweave rugs resist wear without trapping debris. Mats under water bowls prevent moisture damage. Washable rugs offer convenience for pet accidents.
Apply Scratch-Resistant Floor Finishes
Aluminum oxide finishes give better scratch resistance than standard polyurethane. Factory-applied aluminum oxide creates a protective barrier against claws. Water-based and oil-based polyurethane both create hard protective layers that resist scratches. Finishes with multiple layers offer maximum durability.
Common Mistakes That Cause More Damage
Water spills cause warping if left unaddressed. Furniture dragging creates scratches and dents. Harsh chemicals and abrasive cleaning tools damage wood finishes. Skipping protective rugs in high-traffic zones accelerates wear.
When to Call a Professional
Deep gouges affecting structural integrity need professional assessment. Extensive scratching in large areas is beyond DIY capabilities. Seek expert help when damage has discoloration or warping.
Conclusion
You now have what you need to restore your hardwood floors and keep them looking good despite your furry companion. Most dog scratches respond well to simple DIY repairs when you match the fix to the damage depth. So regular nail trimming and strategic rug placement will reduce future scratches drastically. Note that prevention beats repair every time. Take action on those scratches today and implement the protective measures. Your floors will stand up to years of happy paws.
FAQs
Q1. Can dog scratches be removed from hardwood floors? Yes, most dog scratches can be removed or significantly reduced depending on their severity. Light surface scratches that only affect the finish layer can often be fixed with simple solutions like wood markers, wax sticks, or natural oils. Deeper scratches that penetrate into the wood itself require more involved repairs using wood filler, sanding, and refinishing techniques.
Q2. Does the vinegar and olive oil method work for fixing wood scratches? The vinegar and olive oil mixture can help disguise minor surface scratches by nourishing the wood and making it look nicer, but it won’t completely eliminate visible scratches. While this natural remedy may slightly reduce the appearance of imperfections, the outline of scratches will typically still remain visible. For more effective results, consider using wood repair markers, wax fillers, or other dedicated repair products.
Q3. How can I repair scratches in hardwood floors without sanding the entire surface? For scratches that don’t require full floor sanding, you can use several targeted methods. Apply wood filler or wax sticks to fill medium-depth scratches, then smooth with a plastic putty knife. For surface-level damage, use wood stain markers or natural oils like walnut to camouflage the marks. After repairs, apply a matching polyurethane finish just to the affected area, feathering the edges to blend seamlessly with the surrounding floor.
Q4. What’s the best way to fix pet urine stains on hardwood floors? Light-colored urine stains can typically be fixed by sanding the affected area until the finish is removed, then washing the wood with wood bleach to lift the discoloration. For stains that have penetrated deeply into the wood, you may need to sand more aggressively and apply wood filler before refinishing. Always address urine accidents immediately to prevent the moisture from warping the wood or causing structural damage.
Q5. How often should I trim my dog’s nails to prevent floor scratches? Trim your dog’s nails every two to four weeks for indoor dogs, while outdoor dogs that walk on concrete may only need trimming every four to six weeks. A simple test is to listen for clicking sounds when your dog walks on the floor—if you hear clicking, it’s time for a trim. Regular nail maintenance not only protects your floors but also prevents your dog’s gait from being altered by overgrown nails.