Waxing Wood Floors 2026: Oil vs Paste vs Liquid Wax

The right approach to waxing wood floors depends on your floor type, lifestyle, and how much maintenance you’re willing to commit to. Oil wax, paste wax and liquid wax each offer different benefits at the time you wax wood floors. Many homeowners choose based on price or convenience alone, which often results in disappointing outcomes. Selecting the right hardwood floor wax for your specific situation is where proper hardwood floor waxing begins. In this piece, we’ll break down the differences between oil, paste and liquid wax finish wood options. We’ll cover durability and application difficulty along with cost to help you make the best choice.

Understanding Your Floor Wax Options

Image Source: Panel Town & Floors

Three distinct wax categories exist for wood floors. Each has different formulations that affect how they penetrate wood, protect surfaces, and need maintenance over time. Homeowners who understand these compositional differences make better decisions about which product matches their floor conditions and time availability.

What is Oil Wax for Wood Floors

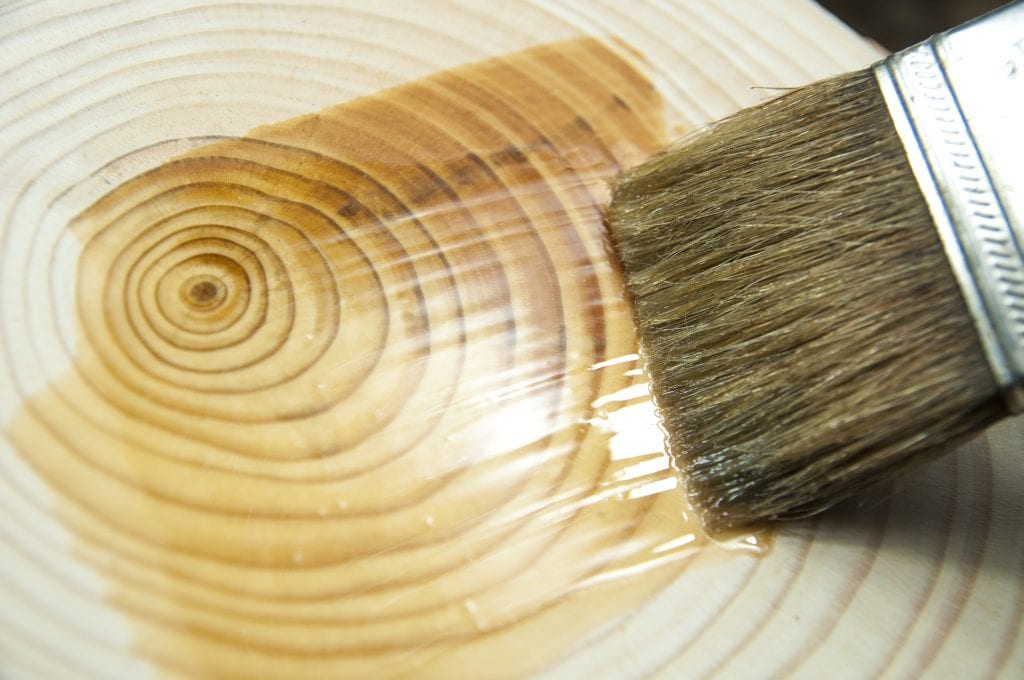
Hardwax oil penetrates deeply into wood fibers rather than sitting on top of the surface. The formulation typically contains one or more vegetable oils mixed with natural hardening waxes. Linseed oil serves as the most common base because its small molecule size allows easy penetration into wood cells. Manufacturers also blend in safflower oil, soy oil, tung oil, or thistle oil depending on the desired characteristics.

The wax component usually consists of beeswax or carnauba wax, which hardens after the oil penetrates. This creates a subtle protective film on the wood surface while boosting grain visibility and providing barriers against moisture and scratches.

Two formula types exist: single-component and two-component versions. Single-component hardwax oils cure through oxidation and react with oxygen in the air. This curing process takes up to 30 days before complete hardening occurs. The floor cannot be exposed to liquids without risking damage during this month-long period.

Two-component products cure through dual reactions. They use oxidative curing plus a chemical process from an additive component, typically an isocyanate hardener. This accelerates drying and increases durability substantially. These formulas typically dry and cure in less than a week and allow floors to return to service much faster. Two-component versions also provide better chemical resistance and liquid resistance compared to single-component options.

VOC content varies substantially between products. Some hardwax oils contain 0% VOCs while others contain varying amounts. Homeowners sensitive to chemical odors should seek zero-VOC formulations, which allow safer application in enclosed spaces without ventilation concerns.

Application is different from traditional floor finishes. Most hardwax oil products just need applying the product to the surface, waiting several minutes for saturation, then removing excess with absorbent cloths. Rather than brushing or spraying, this method works best. Electric buffers handle the application process more efficiently on larger floor areas.

Maintenance requirements prove manageable. Hardwax oil soaks into wood fibers and creates a finish that needs refinishing every 2-3 years depending on traffic levels. This represents a substantial improvement over traditional wax options.

What is Paste Wax for Hardwood Floors

Paste wax represents the oldest wood floor protection method. You’ll find it in historic homes where preservation of original finishes matters. This solvent-based finish comes in cans with a thick, firm consistency.

The formulation contains more wax and less solvent compared to liquid alternatives. Minwax finishing wax costs around USD 17.00 for 16 ounces. This higher wax concentration needs hand application using a cloth, which means getting on hands and knees to work the product into the floor surface.

Natural ingredients dominate traditional paste wax formulations. Many products combine walnut oil with beeswax, odorless mineral spirits, and carnauba wax. Food-contact-safe ingredients make paste wax suitable for kitchen surfaces like butcher blocks and cutting boards.

The protective layer created by paste wax proves relatively weak, especially when compared to hardwax oil or polyurethane finishes. This limitation becomes problematic in areas with regular foot traffic. The finish wears away quickly and makes paste wax unsuitable for high-traffic zones unless you’re prepared for frequent reapplication.

VOC content runs high in traditional paste wax products. This creates strong chemical odors as the finish dries, which isn’t ideal for eco-conscious homeowners or contractors working in occupied spaces. The solvents evaporate during curing and leave only the wax behind.

Maintenance demands prove substantial. Floors finished with paste wax need refinishing every 2-3 months to cover fading and wear. This frequent reapplication schedule makes paste wax impractical for busy households or commercial settings.

Paste wax excels at creating warmth and soft sheen that boosts wood’s natural appearance. The finish offers easy spot repairs since you can simply apply more wax to damaged areas and buff until it matches surrounding surfaces. This flexibility makes paste wax valuable for antique furniture restoration where preserving original finishes takes priority over modern durability standards.

The application process needs multiple steps. You apply a thin layer using a cloth or applicator pad, allow it to haze partially, then buff with a clean cloth until achieving the desired shine level. More buffing produces more shine, while immediate removal creates a duller sheen.

What is Liquid Wax for Wood Floors

Liquid wax contains more solvent and less wax compared to paste formulations. This creates a thinner consistency that flows easily. A quart of Rust-Oleum Satin Wax for Finishing costs around USD 23.00. This solvent-heavy composition allows application by mop rather than hand rubbing.

The increased solvent content creates both advantages and limitations. Application becomes substantially easier since you can use a mop while standing upright rather than kneeling. The thinner consistency spreads more smoothly across floor surfaces without the physical effort paste wax demands.

This convenience comes with a trade-off. Liquid wax needs multiple coats to achieve the same protection level that paste wax provides in fewer applications. Each coat needs drying time before applying the next layer, which extends the total project timeline despite easier individual applications.

Modern liquid wax formulations frequently incorporate synthetic polymers and resins. These advanced compounds bond more effectively to paint and wood surfaces. The technology results in boosted durability while maintaining straightforward application methods that don’t need professional skills.

Liquid wax typically provides longer protection than spray products but shorter duration than paste wax. Products last 3-6 months before needing reapplication and split the difference between paste formulations and quick spray options.

The finish dries faster than traditional paste wax and reduces wait times between coats and before allowing foot traffic. This characteristic appeals to homeowners who need floors back in service quickly.

Like paste wax, liquid wax must be buffable for proper floor use. Products labeled as “no-buff” or one-step waxes attract dirt readily and should be avoided. Traditional liquid waxes that need buffing after application create cleaner, longer-lasting finishes.

Solvent-based liquid wax works best for hardwood floors. Water-based or acrylic liquid waxes cause finished floors to develop white tinges and can damage unfinished hardwood entirely. Always verify the product label specifies “for use on floors” rather than furniture-only applications, since furniture waxes create ultra-slick surfaces that become hazardous underfoot.

Key Differences Between the Three Types

Composition creates the fundamental difference between these wax types. Oil wax (hardwax oil) combines vegetable oils with hardening waxes in a penetrating formula. Paste wax contains high wax concentration with minimal solvent in a thick consistency. Liquid wax reverses this ratio with more solvent and less wax for easier spreading.

Penetration behavior separates oil wax from both traditional options. Hardwax oil soaks into wood fibers and creates a film-forming finish. Paste and liquid waxes sit atop the wood surface rather than penetrating deeply.

Maintenance frequency varies dramatically. Paste wax demands refinishing every 2-3 months. Liquid wax needs reapplication every 3-6 months. Oil wax needs refinishing only every 2-3 years. This difference proves decisive for homeowners who dislike frequent maintenance.

Application methods need different tools and physical effort. Paste wax needs hand application with cloths and kneeling work. Liquid wax allows standing mop application. Oil wax needs cloth or buffer application with excess removal.

Durability levels range substantially. Oil wax creates the most durable finish with resistance to spills, scratches, and wear. Paste wax offers weak protection that wears quickly. Liquid wax falls between these extremes with moderate durability.

Curing time spans vastly different periods. Single-component oil wax takes up to 30 days for complete cure. Two-component oil wax cures in under one week. Paste and liquid waxes cure as solvents evaporate, typically within hours to days depending on conditions.

VOC content affects indoor air quality and application comfort. Paste wax contains high VOC levels with strong odors. Liquid wax VOC content varies by formulation. Oil wax ranges from 0% VOCs to varying amounts, with zero-VOC versions available for sensitive occupants.

Cost per application is different based on product concentration. Paste wax at USD 17.00 for 16 ounces covers more area per container due to higher wax content. Liquid wax at USD 23.00 per quart needs more product for equivalent coverage due to higher solvent content.

Traffic suitability determines appropriate locations. Oil wax handles high-traffic areas effectively due to durability. Paste wax proves unsuitable for high-traffic zones unless frequent refinishing is acceptable. Liquid wax works for moderate traffic areas.

Historic preservation requirements sometimes dictate paste wax use despite practical disadvantages. Many restoration projects need maintaining original finish types and make paste wax necessary regardless of convenience factors.

Oil vs Paste vs Liquid Wax: Direct Comparison

Performance differences between these three wax types become apparent quickly once you start waxing wood floors on a regular basis. Homeowners who choose based solely on original cost often find that cheaper options create more work and expense over time.

Durability and Protection Level

Paste wax creates a thicker protective layer compared to liquid alternatives, but thickness doesn’t translate to superior durability in floor applications. The wax-rich film provides protection against environmental contaminants. This protection proves shorter-lived than modern synthetic formulations. Paste wax lasts 4-8 weeks on floors experiencing regular use before performance diminishes, depending on climate and cleaning frequency. The finish remains sacrificial and wears off through foot traffic and routine maintenance.

Liquid wax incorporates synthetic polymers that form stronger, more resilient bonds with wood surfaces. This results in superior chemical resistance against common household hazards like spilled drinks, tracked-in debris and pet accidents. A quality liquid wax can last 3-6 months before you need to reapply it. The synthetic components create a glass-like protective barrier that resists degradation better than natural waxes alone.

Oil wax outperforms both traditional options. The penetrating formula soaks into wood fibers rather than merely coating the surface, which creates protection from within the wood structure itself. This approach provides resistance to scratches, moisture and general wear that paste and liquid surface coatings cannot match. Floors in high-traffic areas maintain their appearance longer with oil wax finishes because the protection extends below the surface where foot traffic causes the most damage.

Application Difficulty and Time Required

Paste wax demands the most physical effort and time investment. You apply a small amount to an applicator pad or cloth and work it into a thin layer across the floor. Wait for it to cure before buffing. The buffing stage proves critical for achieving proper sheen and requires elbow grease. Paste wax goes on thicker and you get faster build, but applying it takes longer. A full room takes 30-60 minutes on hands and knees working the product into the wood, plus additional time for buffing after the haze develops.

Application skill matters with paste wax. Over-application leads to difficult buffing and white residue that won’t come off easily. Under-application provides minimal protection and wastes effort. You need to work in small sections and maintain consistent pressure to avoid uneven coverage.

Liquid wax offers the most user-friendly application process. The formula spreads easily and can be applied while standing using a mop or applicator pad. Liquid wax goes on quicker and smoother but also thinner. Most homeowners complete a room in 10-15 minutes. The product gets sprayed onto the floor or a microfiber cloth, spread lightly and buffed off with minimal pressure. No curing wait time is required between application and buffing, which accelerates the entire process.

Oil wax falls between these extremes. Application requires flooding the surface, allowing penetration time and removing all excess material. Missing this removal step creates sticky patches that refuse to cure properly. The process takes moderate effort but requires attention to detail rather than physical strength.

Sheen and Appearance After Application

The visual results from each wax type differ. Paste wax delivers a warm, deep luster that many think of as the gold standard for esthetic depth. High-carnauba paste formulations produce the deepest, warmest finish on dark wood species. This traditional look appeals to homeowners restoring historic properties or seeking authentic period esthetics.

Liquid wax creates a glossy, reflective surface that appears sharp and clean. The shine tends toward glass-like clarity rather than the warm glow paste wax produces. Modern synthetic liquid formulas boost this effect and create high-gloss finishes that some homeowners prefer for contemporary interiors.

Buffing technique affects final appearance regardless of wax type. Just a white buffing pad produces semi-gloss to shiny results. Rougher steel wool like 1/0 creates a rougher, more matte surface, while finer steel wool like 4/0 generates shine. This versatility allows you to customize sheen levels based on personal preference rather than being locked into one appearance.

Oil wax produces a low-sheen, natural appearance that highlights wood grain without adding obvious surface coating. The matte finish appeals to homeowners who want wood to look like wood rather than displaying obvious finishing products.

Cost Per Square Foot

Professional waxing services for wood floors run between USD 0.70 and USD 0.86 per square foot in 2026. This baseline cost applies across wax types since labor represents the primary expense component. DIY application eliminates labor costs but requires purchasing materials and tools.

Material costs vary based on product concentration and coverage rates. Paste wax at USD 17.00 for 16 ounces covers area due to high wax content and thin application requirements. A small container can handle multiple rooms when applied correctly. The cost per square foot for materials alone runs USD 0.15 to USD 0.25 for quality paste formulations.

Liquid wax at USD 23.00 per quart requires more product for equivalent coverage due to higher solvent content and thinner protective layers. Material costs reach USD 0.30 to USD 0.45 per square foot. The reduced application time offsets this higher material cost for homeowners who value time savings.

Oil wax products vary widely in price based on formulation complexity and VOC content. Single-component versions cost less but require longer cure times. Two-component formulas command premium prices but deliver faster return-to-service and superior durability. Material costs run higher for oil wax, but the extended reapplication interval (years rather than months) reduces long-term expenses.

Maintenance and Reapplication Frequency

Most homes benefit from wood floor waxing every 6-12 months, depending on foot traffic and wear. This general guideline shifts based on wax type selection. Homes with kids or pets require more frequent attention regardless of product choice, but wax type determines how much more.

Paste wax shows wear fastest in real-life conditions. The finish requires buffing and reapplication every few months to maintain protection and appearance. High-traffic areas like entryways and hallways may need attention every 4-6 weeks to prevent visible wear patterns from developing. This frequent maintenance schedule makes paste wax impractical for busy households unless you enjoy the hands-on aspect of floor care.

Liquid wax extends maintenance intervals. Quality products maintain protection for 3-6 months in residential settings. The synthetic components resist degradation better than natural waxes, which reduces how often you need to strip and reapply. Homes with moderate traffic can often stretch liquid wax to the full 6-month interval before performance drops.

Oil wax requires the least frequent maintenance. Reapplication becomes necessary only every 2-3 years for most installations. This reduction in maintenance frequency appeals to homeowners who want attractive floors without constant upkeep obligations. Spot maintenance proves easier with oil wax as well, since you can refresh small worn areas without treating entire rooms.

Best Use Cases for Each Type

Paste wax suits specific situations despite practical limitations. Historic home restoration projects often require paste wax to maintain period-appropriate finishes and preserve character. Unfinished solid hardwood floors benefit from paste wax application since the product seeps into fibers and provides natural, breathable protection. Homeowners who enjoy hands-on maintenance and appreciate traditional esthetics find paste wax rewarding. The product also works well for furniture and decorative pieces that don’t experience floor-level wear.

Liquid wax serves homeowners seeking balance between protection and convenience. The product handles moderate traffic areas while offering straightforward application that doesn’t require professional skills. Bedrooms, home offices and formal living rooms with limited use represent ideal applications. Liquid wax also suits homeowners new to DIY floor care since application errors prove easier to correct compared to paste wax mistakes.

Oil wax belongs in high-traffic areas where durability matters most. Entryways, hallways, kitchens and family rooms all benefit from the protection oil formulations provide. Homes with pets, children or frequent entertaining need the scratch resistance and moisture protection that penetrating oil finishes deliver. The extended reapplication interval makes oil wax practical for busy households that can’t dedicate time to frequent floor maintenance. Oil wax proves unsuitable for floors already finished with polyurethane or other film-forming products, since proper adhesion requires bare wood or previously oiled surfaces.

How to Apply Each Type of Wax to Wood Floors

Image Source: ServiceMaster Clean

Proper surface preparation determines whether wax adheres correctly or creates sticky patches that never cure fully. Homeowners who skip preparation steps often end up stripping everything and starting over. This doubles both time and material costs.

Preparing Your Floor Before Waxing

Clear the room before you start any waxing process. You need to remove furniture, rugs and even small decorative items to prevent accidental contact with wet wax. I’ve seen homeowners leave their oil tin or tools on the far side of a room, then realize they’ve trapped themselves after applying wax. Plan your exit route before you open any containers.

Check the floor surface for scratches, dents, chips or cracks. Use a wax filler repair kit in the appropriate wood color to fill these imperfections before waxing. Filler won’t key to wood once wax has been applied, so you must do repair work first.

Remove old wax buildup with a soft cloth dampened with mineral spirits or commercial wax stripper like Trewax Heavy Duty Floor Stripper. Work in 2-foot sections. Fine-grade steel wool removes stubborn buildup that cloth alone won’t eliminate. This stripping step becomes necessary when multiple wax layers have accumulated or when you switch between wax types.

Next, eliminate dust and loose debris by dry-mopping with a microfiber cloth pad or vacuuming with a dust brush attachment. Damp mop with a wood-safe cleaner or a homemade solution of one-quarter cup dish soap mixed with 1 gallon warm water if the floor still appears dingy after dusting. Remove leftover cleaner by damp mopping with plain water, then dry with clean towels.

Clean the surface with a polish reviver product to remove years of dirt and grime for liquid wax. This preparation allows wax to penetrate timber better and produces a warmer final color.

Step-by-Step: Applying Oil Wax

Room temperature should reach at least 10°C with good ventilation through open windows or fans. Stir the hardwax oil and reach all the way to the bottom of the container before application.

Start by brushing around room edges with a brush designed for oil application. Work with the grain for an even, natural appearance. Feather your brushstrokes to avoid hard lines where edge work meets the main floor area.

Use a soft-pile roller and work in small sections for the main floor. Start away from the door and move toward it to avoid stepping on wet surfaces. Roll in the direction of the boards and extend to each board edge to prevent visible lines or overlaps. Apply thin, even coats rather than heavy layers. Thick applications take longer to dry and prove more prone to scratching once cured.

Allow 4-6 hours drying time before you apply the second coat after the first coat. Test dryness by sanding a tiny area with fine sandpaper. The surface has dried enough for the next coat if you raise dust.

Two coats provide adequate protection for most installations. Allow 24 hours curing time before you place furniture or subject the floor to normal traffic after the final coat.

Step-by-Step: Applying Paste Wax

Wear gloves and a dust mask to protect yourself from wax solvent fumes. Get into a comfortable kneeling position since paste wax requires hand application throughout the process.

Use a putty knife to scoop about 1 tablespoon of solid wax onto a soft, lint-free cloth. Wrap the wax inside the cloth and create a pad that allows even distribution. Rub the wax in the direction of the flooring for strip or plank floors. Apply with circular motions to avoid streaks on parquet or pattern floors.

Work in 1- to 2-foot sections and spread a thin layer while you move toward an exit. Apply more wax to the cloth as needed until you’ve covered the room. One coat is enough over finished wood, while unfinished wood requires two coats.

Allow the wax to haze, which takes 10 minutes to 1 hour depending on the product and environmental conditions. Buff the surface with a clean white pad or appropriate grade steel wool once hazed. Change pads often because loaded pads smear wax rather than polishing it.

Step-by-Step: Applying Liquid Wax

Shake the bottle before use since wax settles to the bottom. Pour liquid into a wide jar that fits your brush for easier access during application.

Apply with either a soft brush or fine cotton buffing cloths in circular motions. Wipe over the surface in the direction of the grain to remove excess while the wax remains wet. Use a brush for carved areas or tight corners, then wipe off excess following the grain.

Pour or squeeze about 1 tablespoon onto the hardwood floor and dip your mop head into the wax. Work in 1- to 2-foot sections and spread a thin layer starting from one corner and moving toward an exit.

Allow the first coat to dry for 30-60 minutes until it develops a slight haze. Buff off with a clean cloth or furniture wax buffing brush. Apply at least two to three coats for proper protection, as each coat goes on much thinner than paste wax. More thin coats produce better finishes than fewer thick applications.

Drying Time and Buffing Requirements

Temperature and humidity affect drying speed. Ideal conditions fall between 70-80°F with humidity around 40-60%. Wax dries faster in warm, low-humidity environments.

Water-based waxes dry faster than solvent-based formulations. Each wax layer requires 30 minutes to 1 hour between coats. Use the touch test to verify readiness: touch the wax with your fingertip. Buffing can begin if it feels dry rather than sticky.

Buff in 2-foot sections starting where you began application for paste and liquid wax. Buff in the direction of wood grain until you achieve desired shine. Rent an electric floor buffer from Home Depot for faster results on both wax types.

Allow waxed floors to settle for a minimum of 8 hours before you walk on them or move furniture back. New finishes should not be buffed or burnished sooner than 24-48 hours after you apply the last coat.

Comparison Table

Oil vs Paste vs Liquid Wax: Comparison Table

AttributeOil Wax (Hardwax Oil)Paste WaxLiquid Wax
How It WorksPenetrates into wood fibers and creates film-forming finishSits on top of wood surfaceSits on top of wood surface
DurabilityMost durable; resists scratches, moisture and wearWeakest protection; wears quicklyModerate durability; better than paste
Protection Duration2-3 years before refinishing needed4-8 weeks (2-3 months typical)3-6 months
Application MethodCloth or buffer; apply, wait for saturation, remove excessHand application with cloth (on hands and knees)Mop or cloth while standing
Application TimeModerate effort; requires attention to detail30-60 minutes per room plus buffing time10-15 minutes per room
Application DifficultyModerate; requires proper excess removalMost difficult; requires considerable physical effort and skillEasiest; user-friendly
Number of Coats2 coats typical1 coat over finished wood; 2 over unfinished2-3 thin coats required
Drying/Curing TimeSingle-component: up to 30 days
Two-component: less than 1 week
Between coats: 4-6 hours
10 minutes to 1 hour to haze; 8+ hours before traffic30-60 minutes between coats; 8+ hours before traffic
Cost (Materials)Higher original cost; varies by formulationUSD $17.00 for 16 oz (USD $0.15-$0.25 per sq ft)USD $23.00 per quart (USD $0.30-$0.45 per sq ft)
Long-Term CostLowest (due to infrequent reapplication)Highest (due to frequent reapplication)Moderate
Professional CostUSD $0.70-$0.86 per sq ftUSD $0.70-$0.86 per sq ftUSD $0.70-$0.86 per sq ft
VOC Content0% to varying amounts (zero-VOC options available)High VOC levels; strong chemical odorsVaries by formulation
Sheen/AppearanceLow-sheen, natural matte finish; brings out wood grainWarm, deep luster; traditional lookGlossy, reflective, glass-like surface
Traffic SuitabilityHigh-traffic areas; handles heavy useUnsuitable for high-traffic unless frequent refinishing acceptableModerate traffic areas
Best Use CasesEntryways, hallways, kitchens and family rooms; homes with pets or children; busy householdsHistoric home restoration; unfinished solid hardwood and furniture; low-traffic areasBedrooms, home offices and formal living rooms; moderate use areas
Buffing RequiredYes, to remove excess during applicationYes, after hazing developsYes, after application
Main AdvantagesLongest protection; most durable; lowest maintenance frequencyTraditional esthetic; easy spot repairs and warm appearanceEasy application; faster than paste; moderate protection
Main DisadvantagesHigher original cost; longer cure time (single-component); requires bare wood or previously oiled surfacesFrequent reapplication needed; physically demanding with high VOCs and weak protectionRequires multiple coats; shorter protection than oil wax; moderate cost
CompositionVegetable oils (linseed, tung, soy) + hardening waxes (beeswax, carnauba)High wax concentration + minimal solventHigh solvent content + less wax; often has synthetic polymers

Conclusion

Your choice between these three wax types comes down to how much maintenance you’re willing to handle. Oil wax wins for durability and long-term value, and it removes the need for frequent reapplication in high-traffic areas. Paste wax suits historic homes and traditionalists who don’t mind getting on their knees every few months. Liquid wax splits the difference with simple application and moderate protection.

Homeowners pick paste wax based on nostalgia, then find the maintenance schedule becomes overwhelming. I’d recommend oil wax for busy households and liquid wax for moderate-use rooms without question. Your floor traffic patterns should guide this decision more than original cost.

FAQs

Q1. Which type of wax provides the longest-lasting protection for hardwood floors? Oil wax (hardwax oil) offers the most durable protection, lasting 2-3 years before requiring reapplication. This is significantly longer than paste wax, which needs refinishing every 2-3 months, or liquid wax, which typically lasts 3-6 months. Oil wax penetrates deep into wood fibers rather than just sitting on the surface, providing superior resistance to scratches, moisture, and wear.

Q2. Can you apply wax directly to unfinished hardwood floors without a sealer? Yes, you can apply wax directly to unfinished hardwood floors, though it’s uncommon. Wax alone provides good water resistance and keeps the wood light in color. However, this approach requires more frequent maintenance—typically yearly reapplication—since the wax serves as the only protective layer. Hardwax oil products are specifically designed for this purpose and offer better durability than traditional paste or liquid wax applied without a sealer.

Q3. Why is paste wax not recommended for high-traffic areas? Paste wax creates a relatively weak protective layer that wears away quickly under regular foot traffic. In high-traffic zones like entryways and hallways, paste wax may need reapplication every 4-8 weeks to maintain adequate protection and appearance. The finish is sacrificial and simply can’t withstand heavy use without frequent maintenance, making it impractical for busy households.

Q4. What’s the main advantage of liquid wax over paste wax? Liquid wax offers significantly easier application—you can apply it while standing using a mop rather than kneeling on hands and knees. The thinner consistency spreads smoothly and typically takes only 10-15 minutes to complete a room, compared to 30-60 minutes for paste wax. Additionally, liquid wax incorporates synthetic polymers that provide better chemical resistance and longer protection (3-6 months versus 2-3 months for paste wax).

Q5. Do waxed floors require different maintenance than polyurethane-finished floors? Yes, waxed floors require more frequent maintenance than polyurethane finishes. While polyurethane can last years without reapplication, waxed floors need regular renewal—paste wax every 2-3 months, liquid wax every 3-6 months, and oil wax every 2-3 years. However, waxed floors offer easier spot repairs since you can simply apply more wax to damaged areas and buff to match the surrounding surface, whereas polyurethane typically requires professional refinishing of entire sections.

📬 Subscribe to DecorModern newsletter

We don’t spam! Read more in our privacy policy

Scroll to Top